2016. 3. 9. 19:04
https://blog.naver.com/nagne2011/220650305381
오늘은
사운드와 파티클을 넣어보자
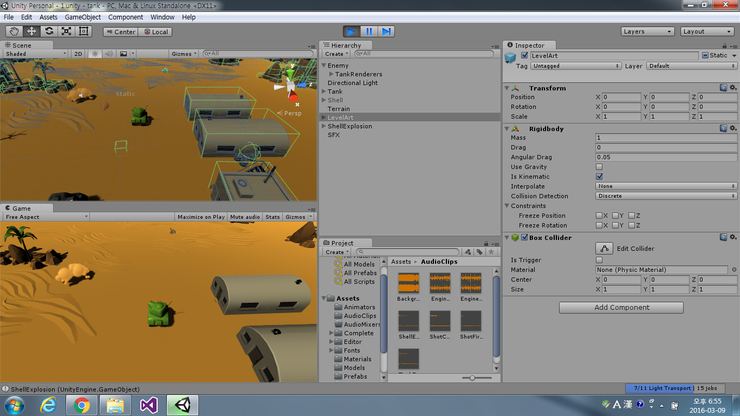
각각의 폴더 내에서 파일을 확인 할 수 있다.
그리고 드래그앤드롭으로 가져올 수 있다.
<파티클>

파티클을 불러오면 몇가지 기능중에, Looping과 Play On Awake가 있다.
이름 그대로, 반복기능과 play시 작동되는 기능이다
예제의 파티클은 '대포알 폭발'파티클 이니까 둘다 해제해 두었다
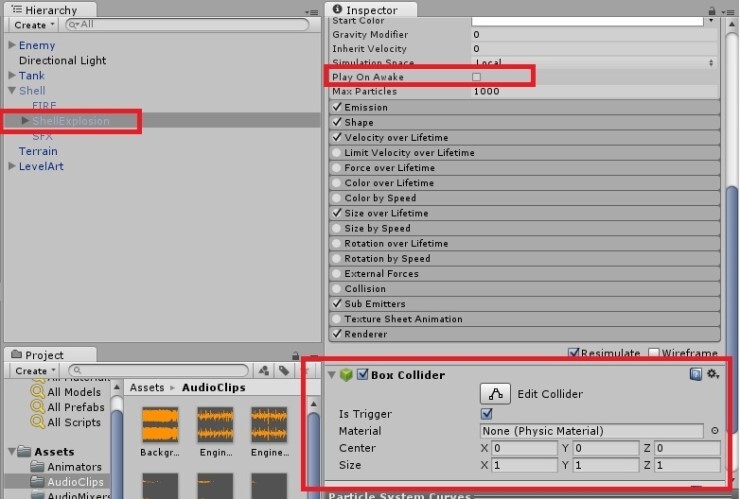
폭발 파티클은 위에서 말한대로 Play On Awake를 해제한뒤
Box Collider를 붙여줬다
충돌을 확인해서(OnTriggerEnter()) 오브젝트에 충돌시 동작하게 구현 할 예정이다
아래 스크립트는, shell에 붙게 될 스크립트다.
거기다 _lifeTime을 받아서, 3초뒤 대포알이 삭제되는 스크립트가 Tank에 붙어있었는데
그 부분을 가져와서 대포알에 넣어두었다.
|
1
2
3
4
5
6
7
8
9
10
11
12
13
14
15
16
17
18
19
20
21
22
23
24
25
26
27
28
29
30
31
32
33
34
35
|
using UnityEngine;
using System.Collections;
public class Shell : MonoBehaviour {
public float _lifeTime = 2.0f; //시간을 만들고 시간뒤에 삭제되도록 설정
public ParticleSystem explosionPartical; //파티클 변수
// Use this for initialization
void Start () {
}
// Update is called once per frame
void Update () {
}
void OnTriggerEnter(Collider other)
{
explosionPartical.transform.parent = null;
//터지는 도중에 대포알을 따라가버리기 때문에, 부딪히는 순간 둘의 부모자식 관계를 끊는다
explosionPartical.Play ();//파티클 재생
Destroy (explosionPartical.gameObject, explosionPartical.duration);
//explosionPartical.duration : 파티클의 재생시간, 시간이 끝나면 삭제가됨
Destroy (this.gameObject);
//게임 오브젝트(대포알) 삭제
}
}
|
cs |
public ParticleSystem explosionPartical; //파티클 변수
파티클 변수를 선언하면 만사오케이
<사운드>

사운드도 마찬가지로 간단하다
역시 비슷한 체크박스가 있다
먼저 사운드를 생성하는 방법은 여러가지가 있는데,
여기서는 빈 오브젝트를 생성하여 Shell에 붙인뒤 그곳에 AudioSource를 붙여서 사용하였다.
SFX는 폭발시 나오는 소리의 AudioSource를 가져왔기때문에, PlayOnAwake를 해제하였고
우측의 FIRE는 발사시 나오는 소리이기 때문에 Shell이 생성될때(발사 버튼을 누를때마다 대포알이 생성되니까 그때)
바로 재생되어야 하니까 PlayOnAwake를 체크하였다.
|
1
2
3
4
5
6
7
8
9
10
11
12
13
14
15
16
17
18
19
20
21
22
23
24
25
26
27
28
29
30
31
32
33
34
|
using UnityEngine;
using System.Collections;
public class Shell : MonoBehaviour {
public float _lifeTime = 2.0f; //시간을 만들고 시간뒤에 삭제되도록 설정
public ParticleSystem explosionPartical; //파티클 변수
public AudioSource shootingSound; //오디오 변수
public AudioSource shootingSound2; //오디오 변수
// Use this for initialization
void Start () {
}
// Update is called once per frame
void Update () {
}
void OnTriggerEnter(Collider other)
{
explosionPartical.transform.parent = null;
//터지는 도중에 대포알을 따라가버리기 때문에, 부딪히는 순간 둘의 부모자식 관계를 끊는다
shootingSound.transform.parent = null; //t사운드도 부모자식 관계 끊기
explosionPartical.Play ();//파티클 재생
shootingSound.Play(); //재생
Destroy (explosionPartical.gameObject, explosionPartical.duration);
//explosionPartical.duration : 파티클의 재생시간, 시간이 끝나면 삭제가됨
Destroy(shootingSound.gameObject, explosionPartical.duration);
Destroy (this.gameObject);
//게임 오브젝트(대포알) 삭제
}
}
|
cs |
오디오 추가도 같은 방법으로 진행하면 된다.
다만 아쉽게도 오디오소스는 duration이 없어서
파티클이 끝날때 오디오도 같이 끝나도록 조정했다.
<넉백>
|
1
2
3
4
5
6
7
8
9
10
11
12
13
14
15
16
17
18
19
20
21
22
23
24
25
26
27
28
29
30
31
32
33
34
35
36
37
38
39
40
41
42
43
44
45
46
47
48
49
50
51
52
53
54
55
56
57
58
|
using UnityEngine;
using System.Collections;
public class Shell : MonoBehaviour {
public float _lifeTime = 2.0f; //시간을 만들고 시간뒤에 삭제되도록 설정
public ParticleSystem explosionPartical; //파티클 변수
public AudioSource shootingSound; //오디오 변수
public AudioSource shootingSound2; //오디오 변수
public float explosionRadius = 5.0f; //넉백 범위
public float explosionPower = 1000.0f; //넉백 파워
// Use this for initialization
void Start () {
}
// Update is called once per frame
void Update () {
}
void OnTriggerEnter(Collider other)
{
//폭발 범위내에 물건 밀처내기
Collider[] colliders = Physics.OverlapSphere(this.transform.position, explosionRadius);
//Physics.OverlapSphere(시작위치, 사거리);
//foreach(var collider in colliders) //foreach 쓰는방법
for(int i = 0; i<colliders.Length; ++i) //for 쓰는방법
{
//if(colliders[i].tag == "tank") //안좋은 방법 sting대string비고
if(colliders[i].CompareTag("MyTank")) //값과 값의 비교다
{//부딪힌 대상의 Tag가 "MyTank"일때만 반응한다.
Rigidbody target = colliders[i].GetComponent<Rigidbody>();
if(!target)
{
continue;
}
target.AddExplosionForce(explosionPower, this.transform.position, explosionRadius);
//target.AddExplosionForce(파워, 위치, 반경) : 폭발 함수
}
}
explosionPartical.transform.parent = null;
//터지는 도중에 대포알을 따라가버리기 때문에, 부딪히는 순간 둘의 부모자식 관계를 끊는다
shootingSound.transform.parent = null; //t사운드도 부모자식 관계 끊기
explosionPartical.Play ();//파티클 재생
shootingSound.Play(); //재생
Destroy (explosionPartical.gameObject, explosionPartical.duration);
//explosionPartical.duration : 파티클의 재생시간, 시간이 끝나면 삭제가됨
Destroy(shootingSound.gameObject, explosionPartical.duration);
Destroy (this.gameObject);
//게임 오브젝트(대포알) 삭제
}
}
|
cs |
모든 변수가 적용된 스크립트는 아래와 같다

'유니티' 카테고리의 다른 글
| 유니티 Character Controller (0) | 2022.02.13 |
|---|---|
| 유니티 2D 스프라이트 활용 (0) | 2022.02.13 |
| 유니티 튜토리얼 - TANKS! - 1 (0) | 2022.02.13 |
| 유니티 Ray (0) | 2022.02.13 |
| 유니티 물리처리 rigidbody (0) | 2022.02.13 |